Projects
Working with projects in Posium
Creating a Project
Projects in Posium serve as containers for your tests, reports, and related configurations. Creating a new project is the first step to organizing your testing efforts.
Steps to Create a Project
-
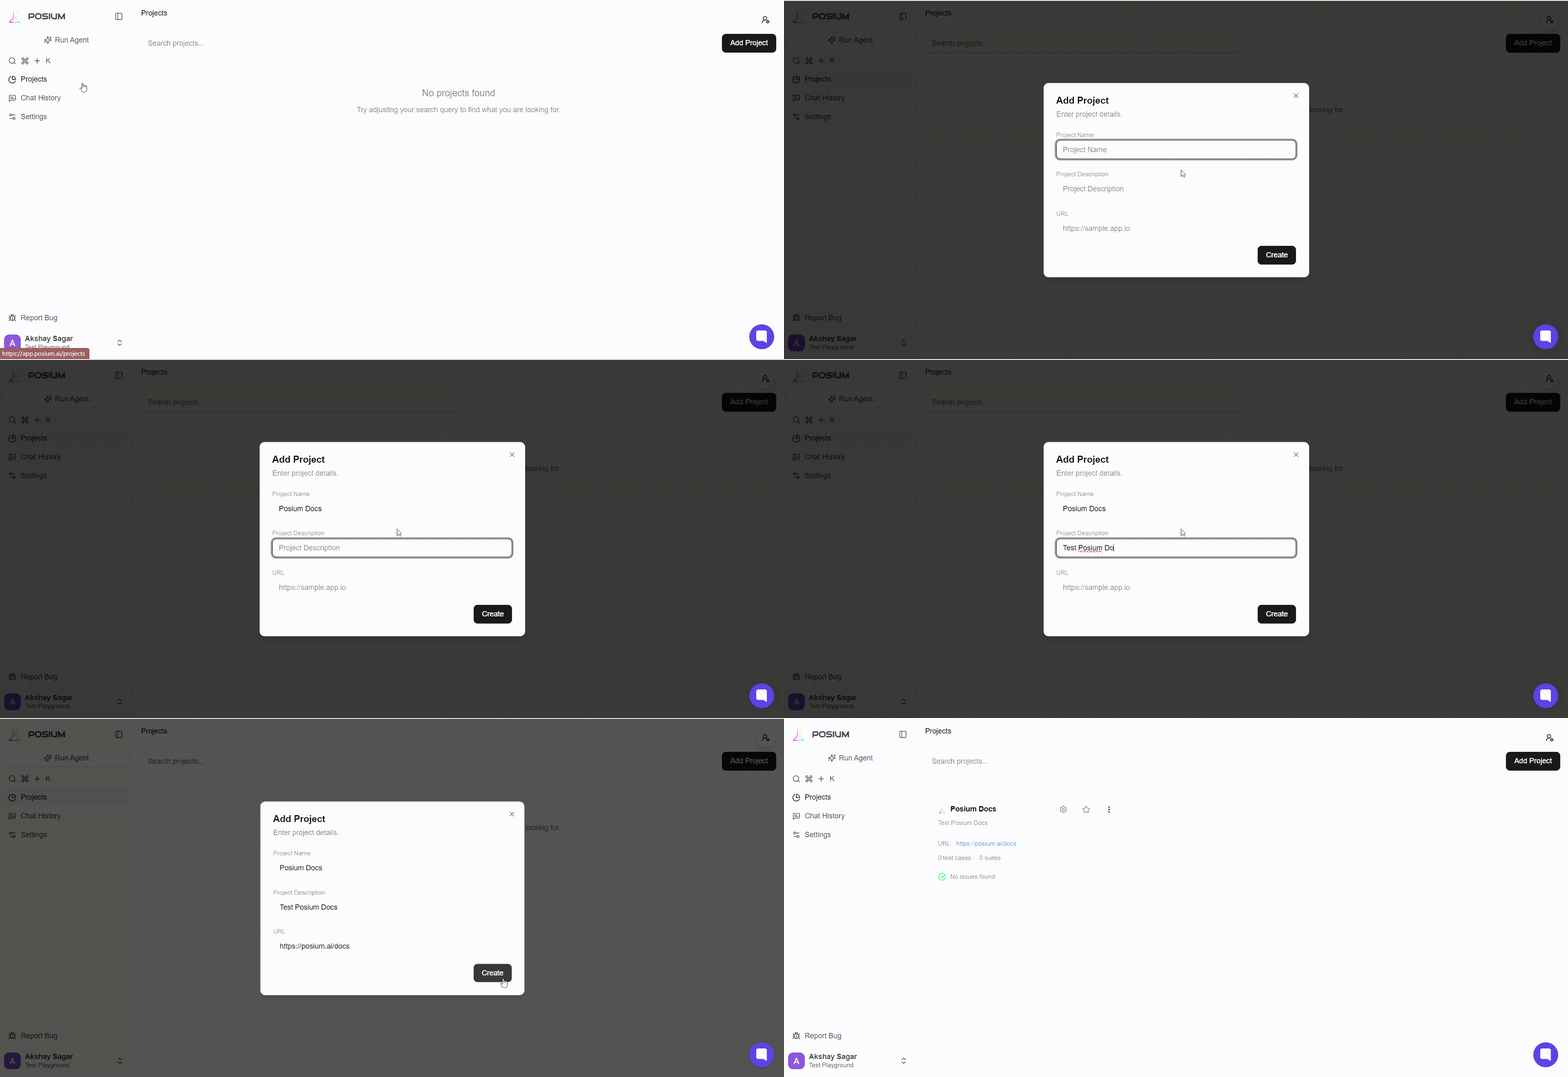
Locate the "Add Project" Button: On the main dashboard or projects overview page, you will find an "Add Project" button, located on the right side of the interface. Click this button to initiate the project creation process.
-
Fill in Project Details: A form will appear, prompting you to enter the necessary information for your new project. You must provide the following details:
- Name: A unique and descriptive name for your project.
- Description: A brief explanation of what this project entails or its purpose.
- URL: The base URL relevant to the project's tests (e.g., the application's environment URL).
-
Complete Creation: After filling in all the required fields, click the "Create "

Adding Members to a Project
Once a project is created, you can add specific members from your organization to collaborate on it. Assigning project-specific roles ensures that each team member has the appropriate level of access and permissions within that particular project, allowing for granular control over project workflows.
Steps to Add Project Members
-
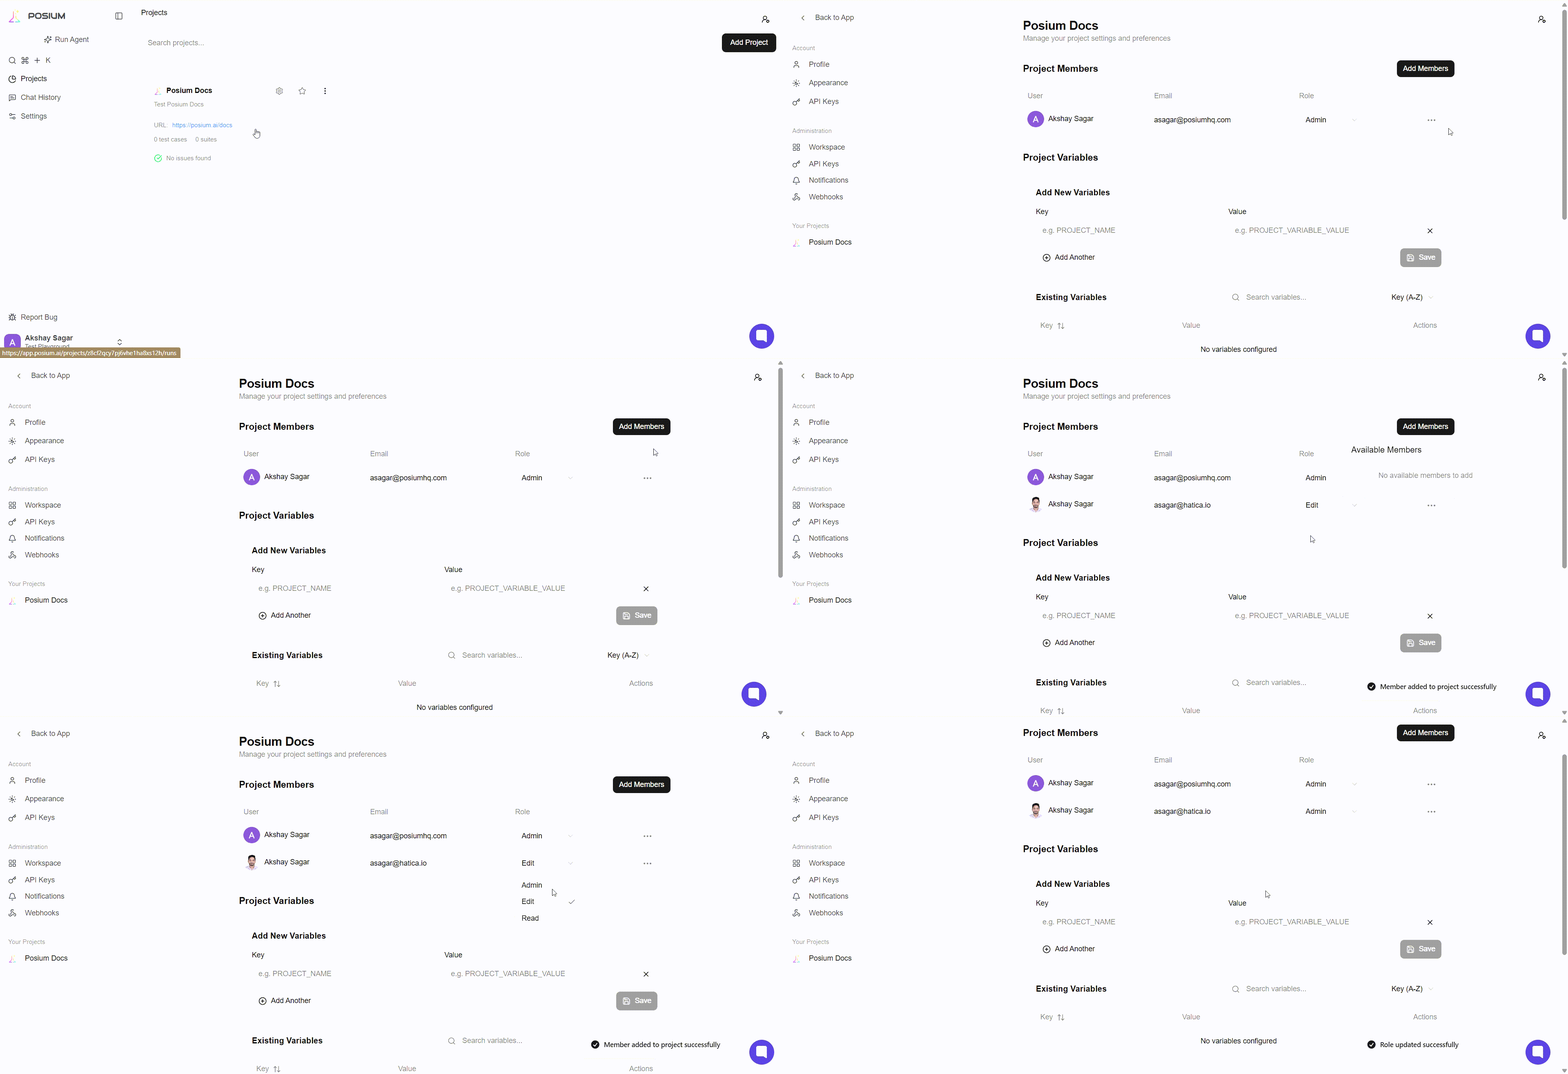
Access the "Add Members" Option: Within your project's dashboard or settings, locate and click the "Add members" button, positioned at the top right side of the project interface.
-
Select Organization Members: A list of users already part of your Posium organization will appear. From this list, select the individuals you wish to add to the current project.
-
Assign Project Roles: For each selected member, you can assign a specific role for this project. These project-level roles define what actions they can perform within the context of this specific project.
Project-Specific Roles and Permissions
-
Project Admin:
- Has full control over the project's settings and management aspects.
-
Project Editor:
- Can create new tests within the project.
- Can run existing tests within the project.
-
Project Read:
- Can only view test results and reports generated within the project.

Adding Project Variables
Project variables in Posium allow you to store specific values that your tests might need to run successfully. This is incredibly useful for sensitive information like login credentials (e.g., email and password for a tool or webpage) or other data that you don't want hardcoded into your tests. By using variables, you can easily manage and update these values in one central place, ensuring your tests always have the correct inputs.
Steps to Add Project Variables
-
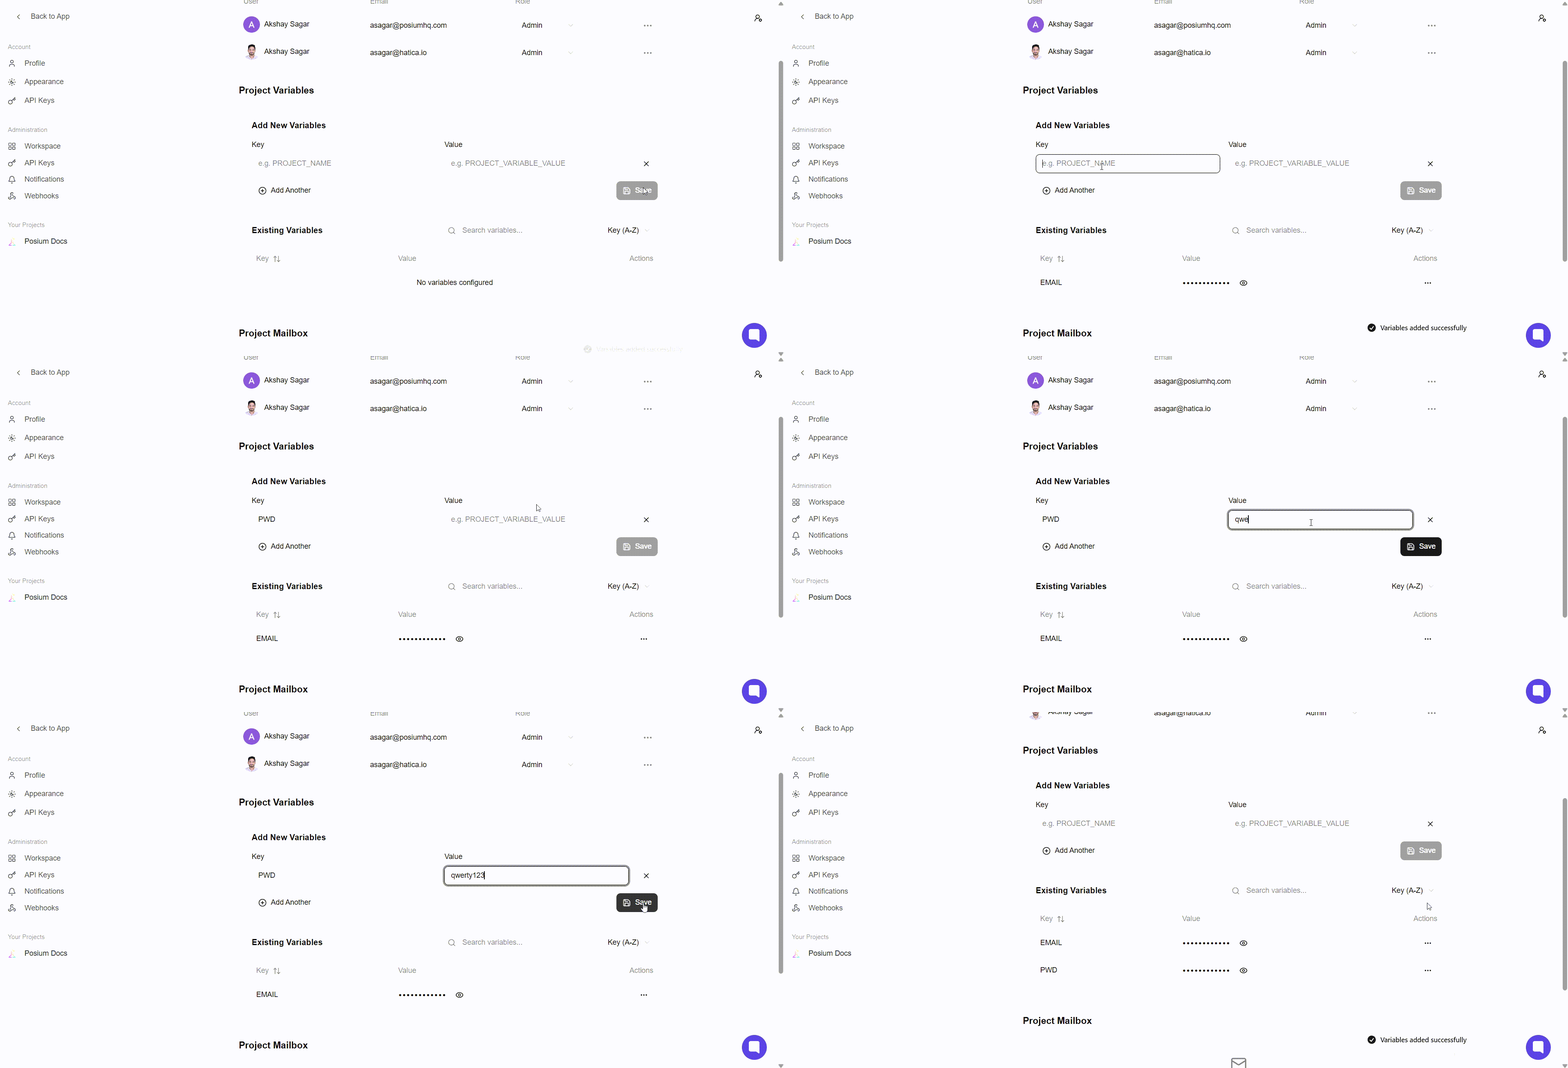
Navigate to Project Variables: Within your project, go to the "Project Variables" section.
-
Input Variable Details: You'll see options to add new variables. For each variable, you need to provide two pieces of information:
- Variable Name: A descriptive name for your variable (e.g.,
Email,Password). - Variable Value: The actual value that the variable will hold (e.g.,
test@example.com,mySecurePassword123).
- Variable Name: A descriptive name for your variable (e.g.,
-
Save Your Variables: After adding your variable name and its corresponding value, click the "Save" button to store these variables for your project.
Smart Variable Recognition
One of Posium's intelligent features is its ability to understand variable names even with slight variations. You don't need to be exact with your variable naming. For example, if you set a variable named Password, the AI is smart enough to recognize related terms like PWD or Passwrod (even with a typo) when used in your tests, ensuring a smoother test creation process.

Setting Up Project Mailbox
For tests that involve email-based verifications, such as logging in with a One-Time Password (OTP) sent to an email address, Posium allows you to set up a dedicated project mailbox. This feature provides a unique email ID that your tests can use to receive and access OTPs or other verification codes directly within the testing flow.
Steps to Set Up a Project Mailbox
-
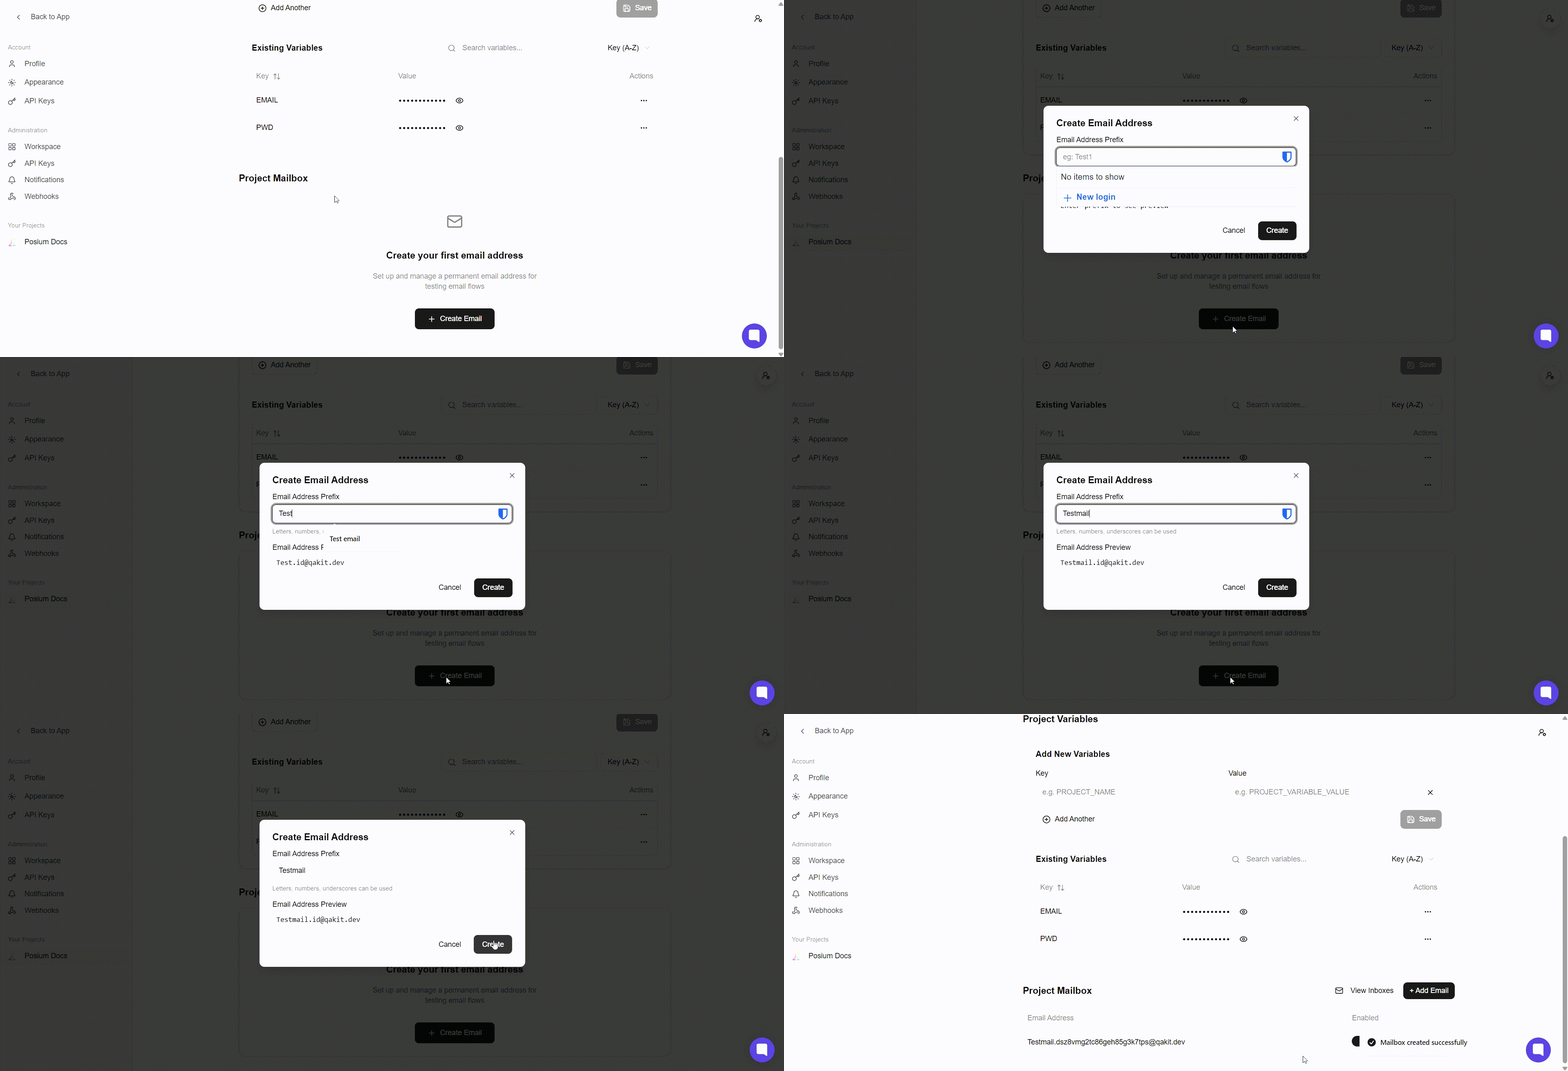
Navigate to Project Mailbox Section: Within your project settings, locate the "Project Mailbox" section.
-
Provide a Mailbox Name: You will be prompted to enter a descriptive name for your mailbox. This name helps you identify the mailbox later if you have multiple setups.
-
Generate Email ID: Once you provide a name, Posium will automatically generate a unique email ID (e.g.,
your-name@your-domain.posium.ai) for this project mailbox. This is the email address that your tests will interact with. -
Save Configuration: Ensure you save the configuration to activate the project mailbox.
